
In Our previous page we implemented OBIA PATCH UPDATES. Please go to ...Previous Page
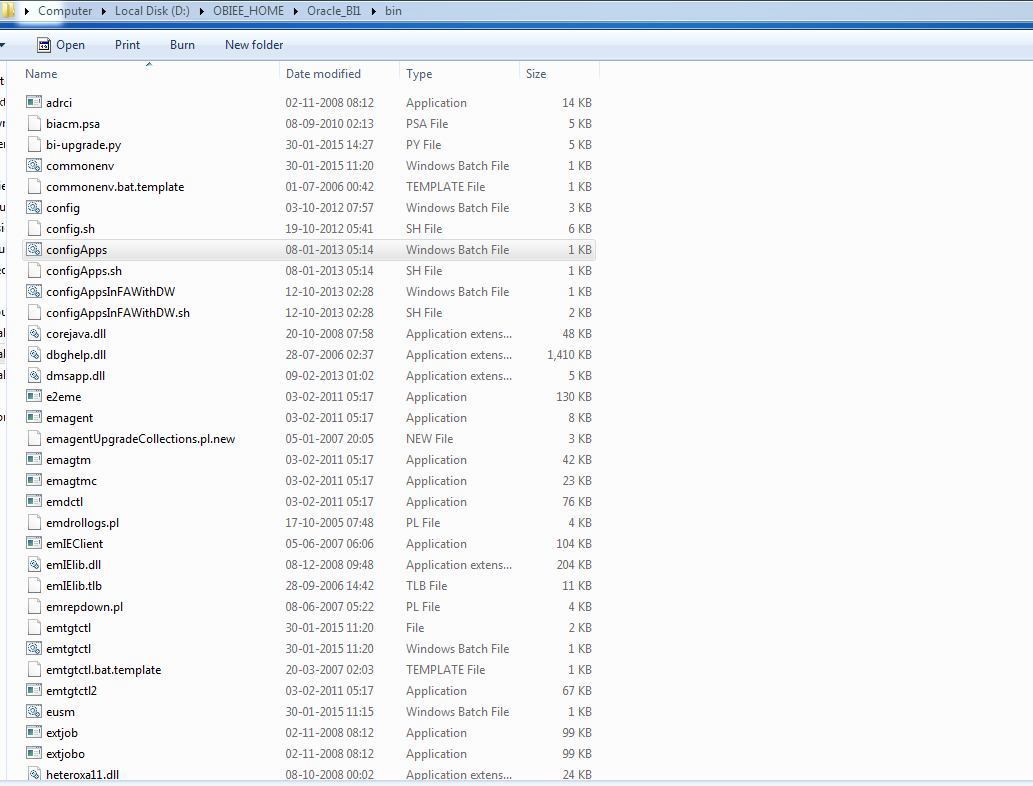


- Go to path C:\OBIEE_HOME\Oracle_BI1\bin → Double click on configapps
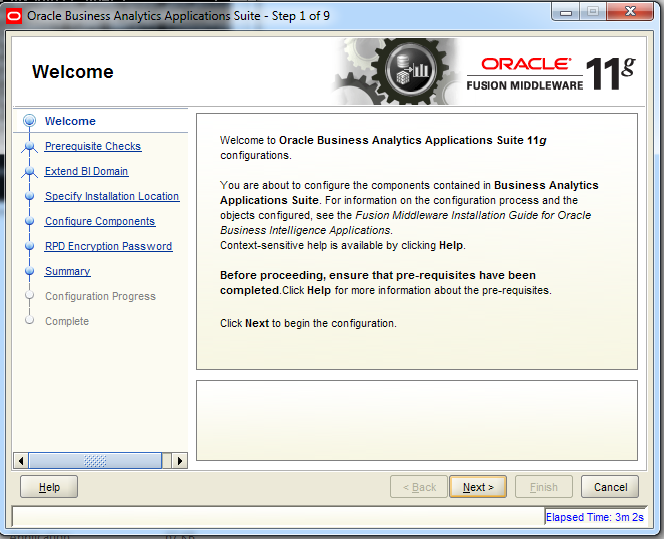
2. Click on NEXT
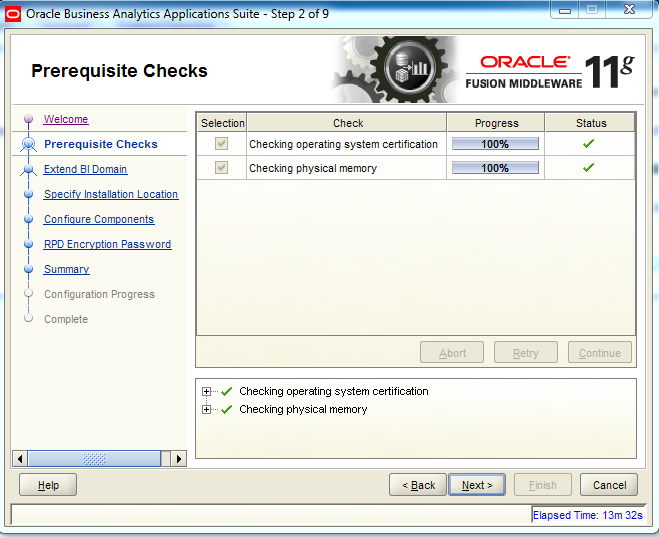
3.Click on NEXT
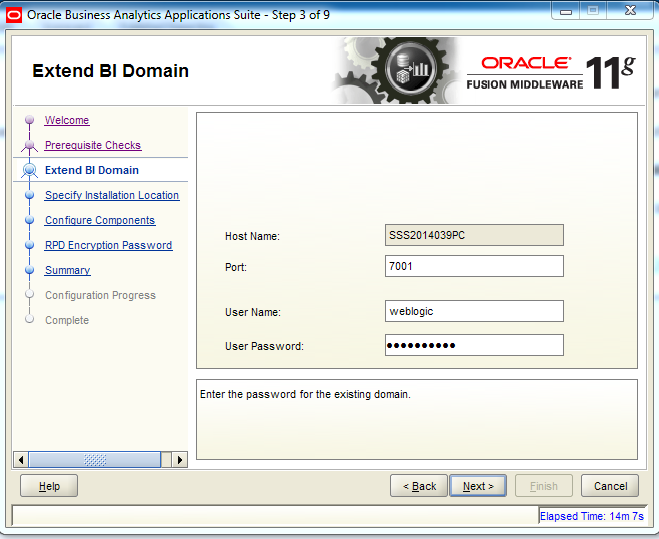
4.Provide password as Admin12$$# → Click on NEXT
5.Observe all parameters → you can not modify any parameters → click on NEXT
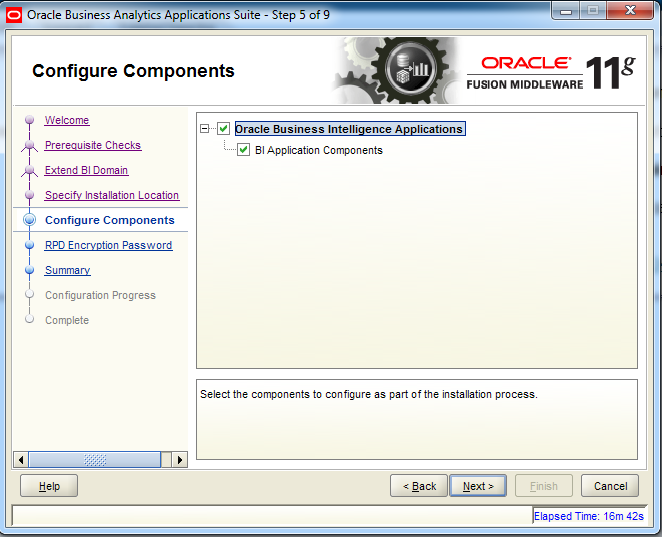
6.Select BI Application Components → Click on NEXT
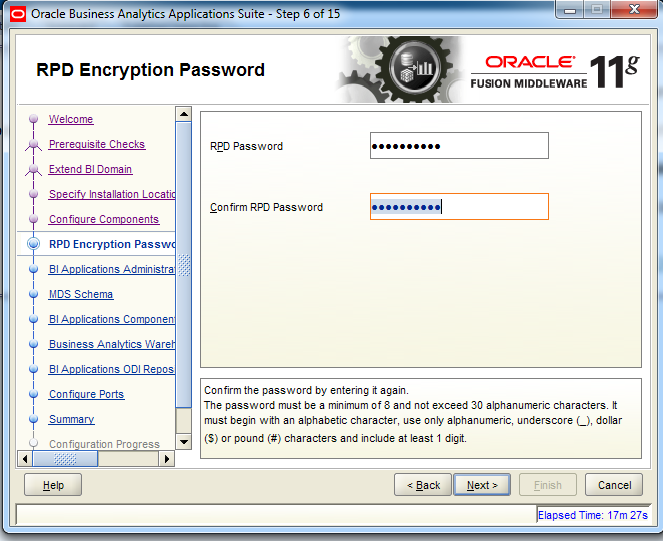
7.Provide RPD password as Admin123 → Click on NEXT
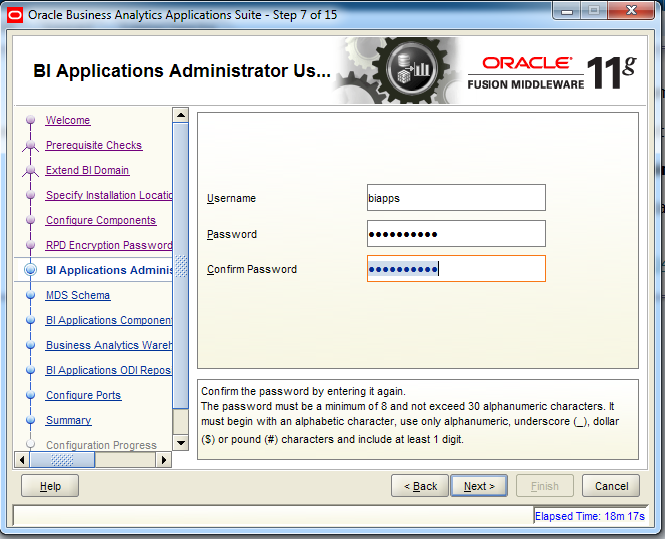
8.Provides username as biapps password as Admin12$$#
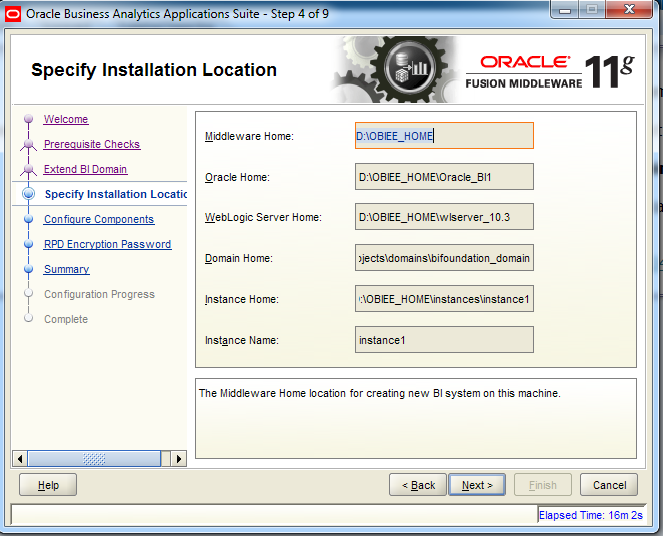
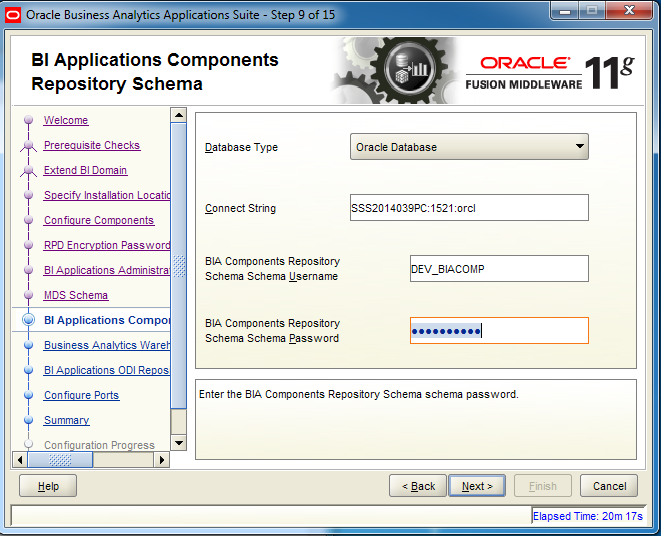
9. Provide below details →ClickonNEXT 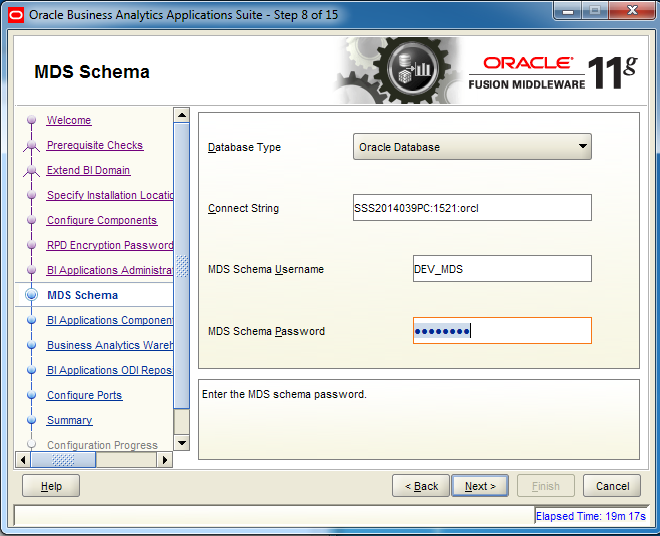
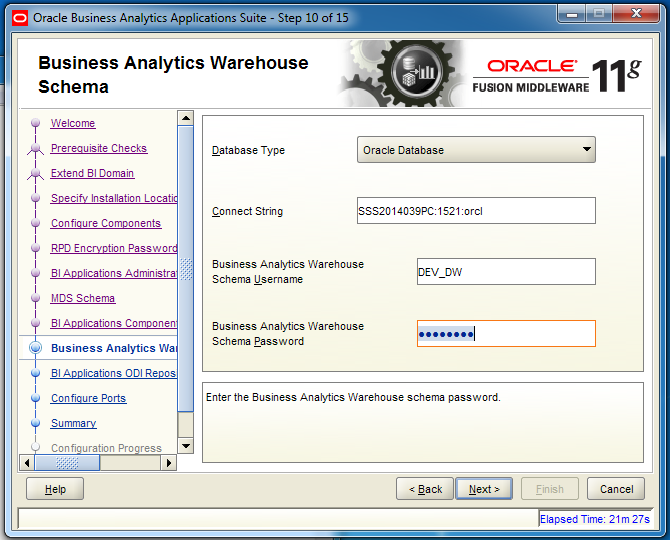
10.Provide below details → Click on NEXT
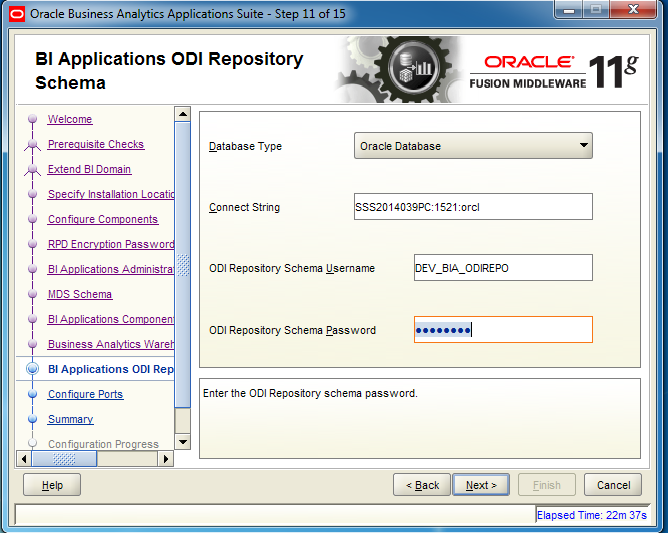
11.Provide below Details → Click on NEXT
12.Provide below Details → Click on NEXT
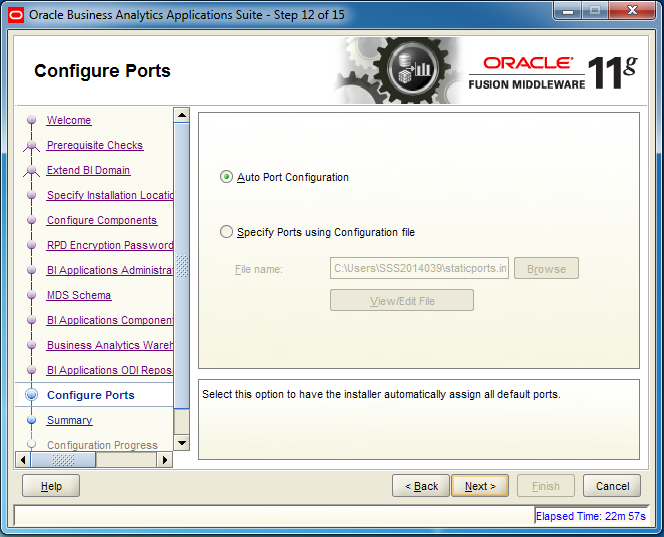
13.Select Auto Port Configuration → Click on NEXT
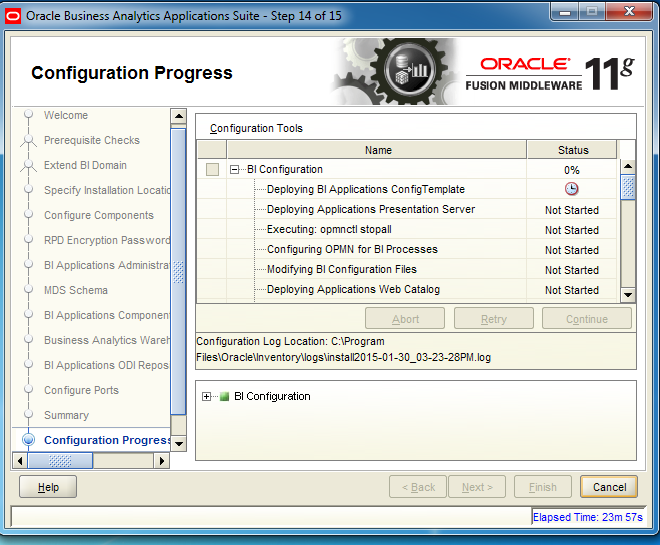
14.Click on Continue
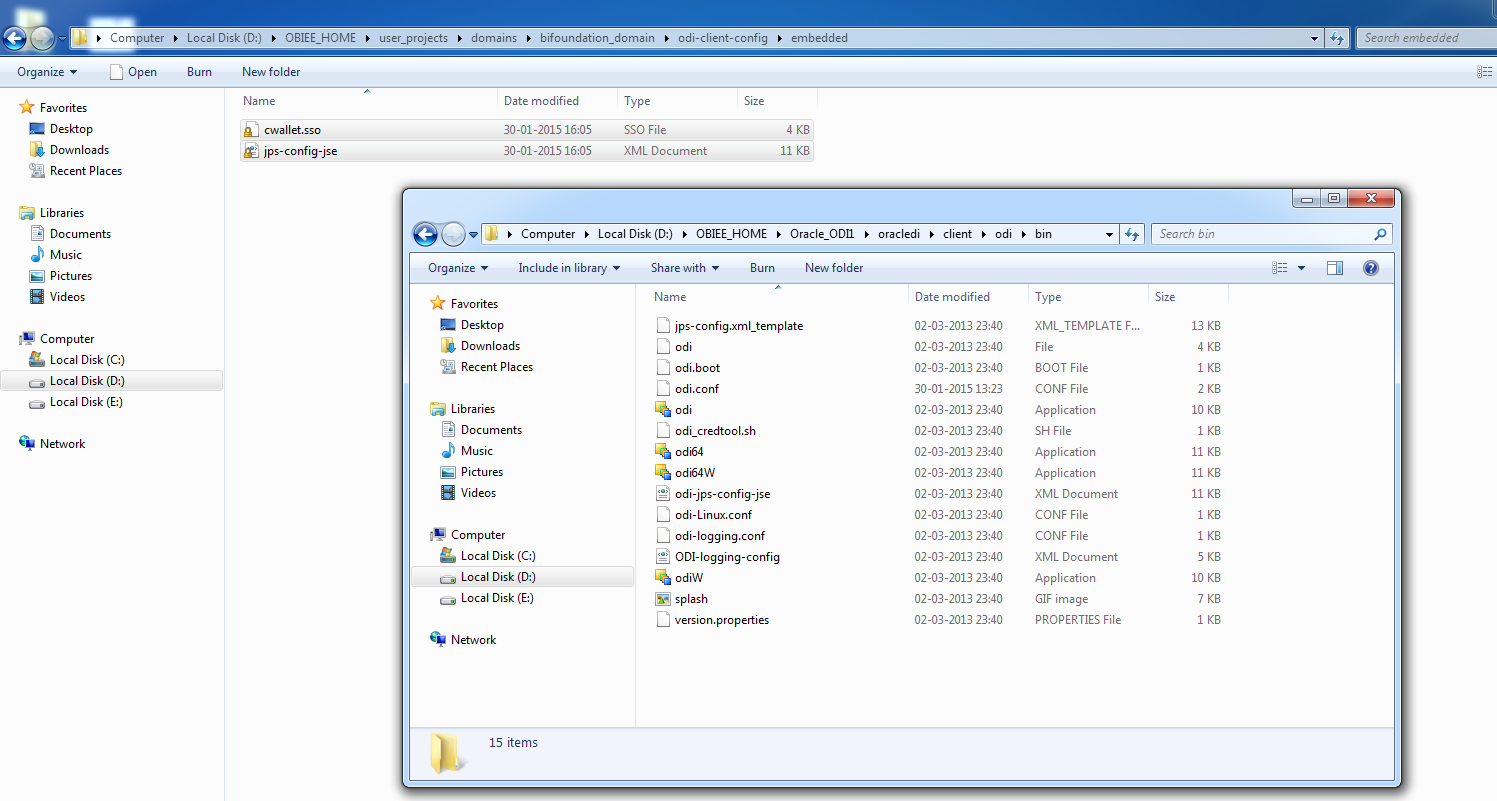
15.To synchronize the security between ODI Studio and the Weblogic server
16.Copy the files cwallet.sso and jps-config-jse.xml from
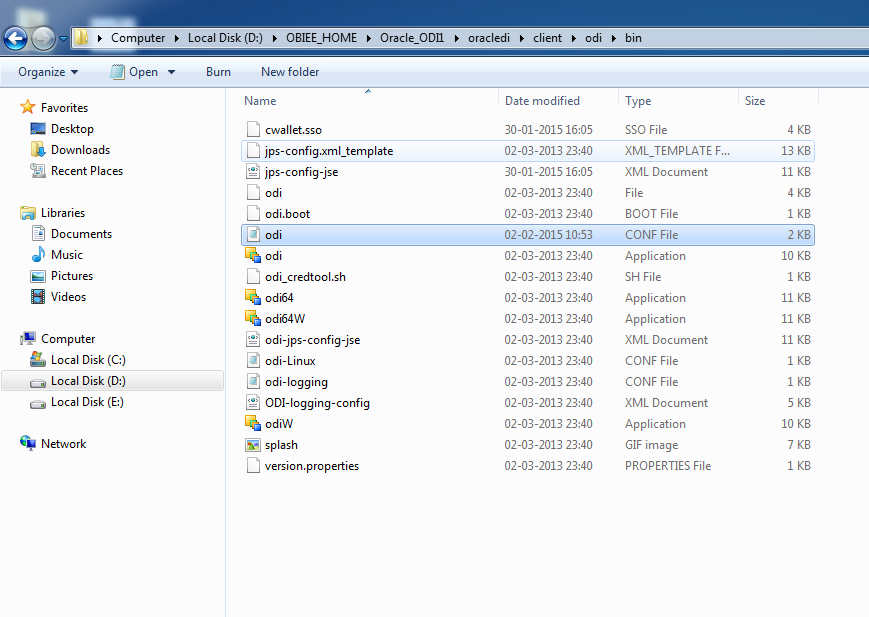
D:\OBIEE_HOME\user_projects\domains\bifoundation_domain\odi-client-config\embedded to D:\OBIEE_HOME\Oracle_ODI1\oracledi\client\odi\bin
17.Now edit the file <ODI_Home>/oracledi/client/odi/bin/odi.conf
18.Locate the line AddVMOption -Doracle.security.jps.config=./jps-config.xml
19.Modify as shown below
20.save → Close
Load Plan Generator Plug-in
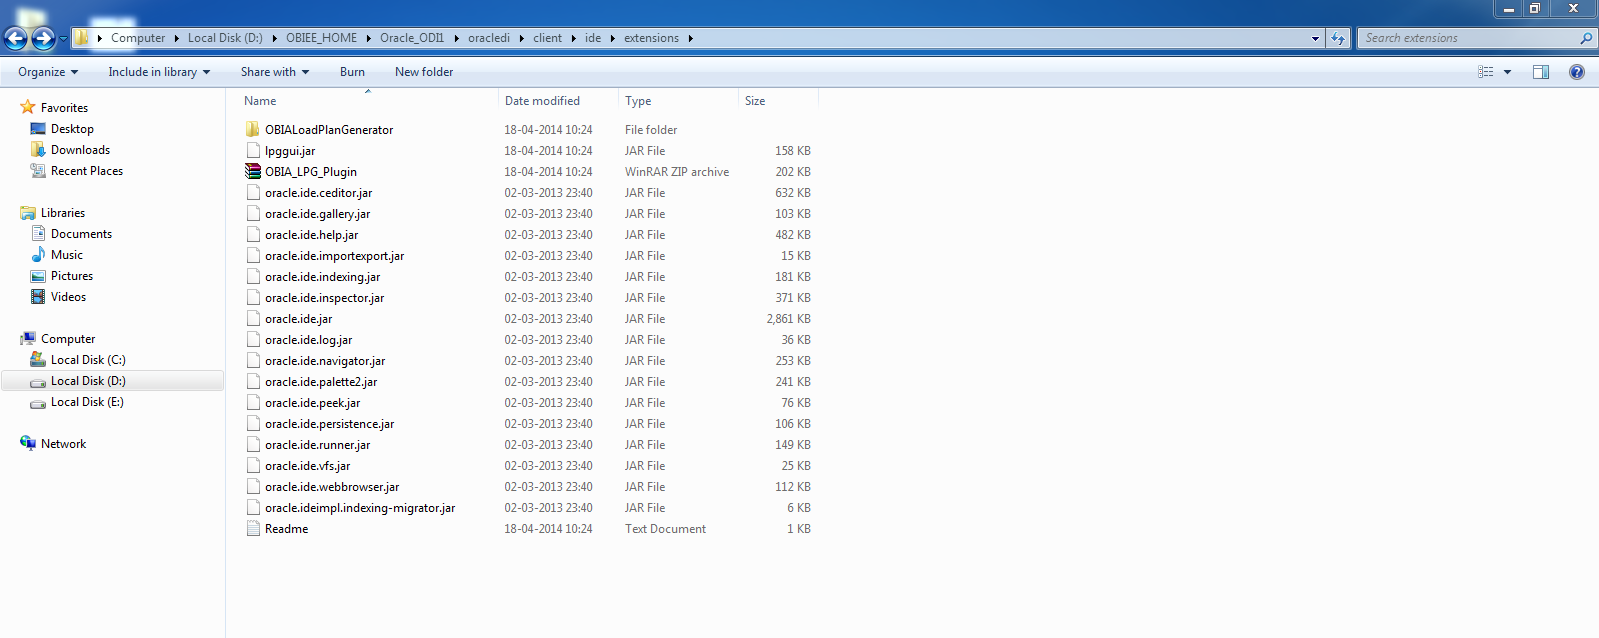
21.The load plan generator plug-in for ODI is supplied in a zip file and it is used by BIACM
22.Copy and paste the file from the location E:\OBIEE_HOME\Oracle_BI1\clients\biappsclients\odi to E:\OBIEE_HOME\Oracle_ODI1\oracledi\client\ide\extensions
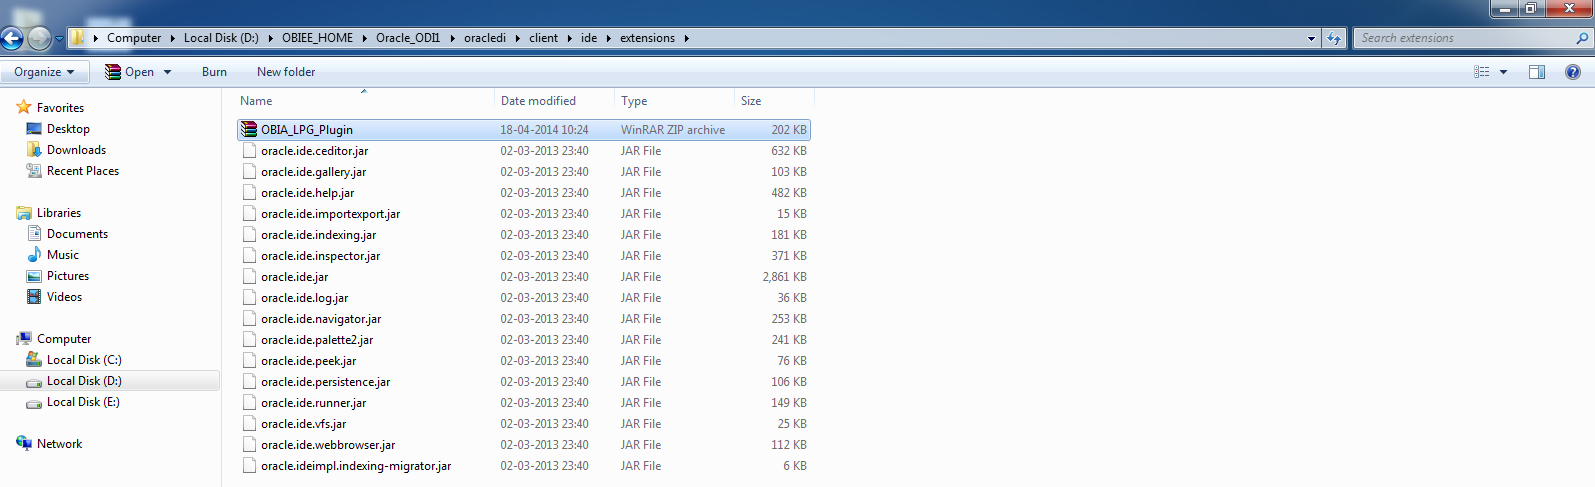
23.Unzip the file OBIA_LPG_PLUGIN
Login to ODI
24.Make sure weblogic server is running
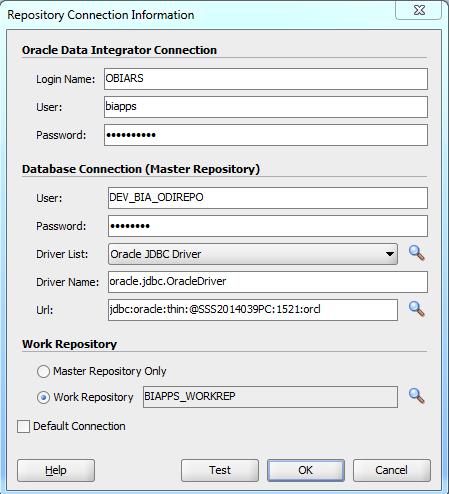
25. open ODI studio
26. click on connect to repository
27. click on new connection
28. provide below details
29.Click on OK
30.Again Ok
31.In previous step we extracted load plan generator ZIP file because of that we got below plugin
32.Now we can see all predefined interfaces of SDE SIL and PLP
Thank you for such detailed guide
ReplyDelete