
In Our previous page we created ATG and FSG Update for BIAPPS, go to ... Previous Page
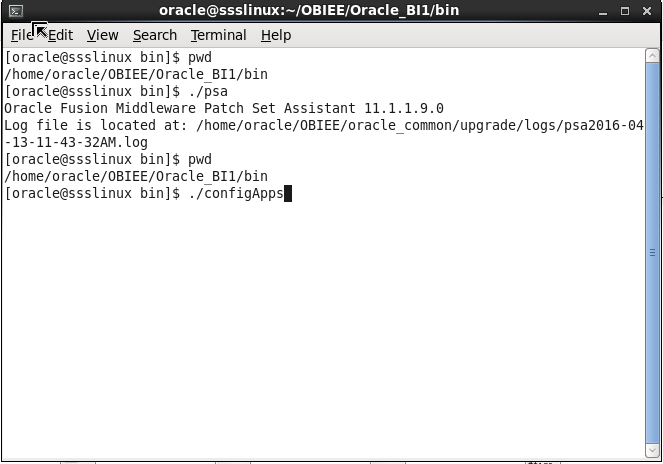


a) Make sure that before running configApps all server need to start. Node manager also.
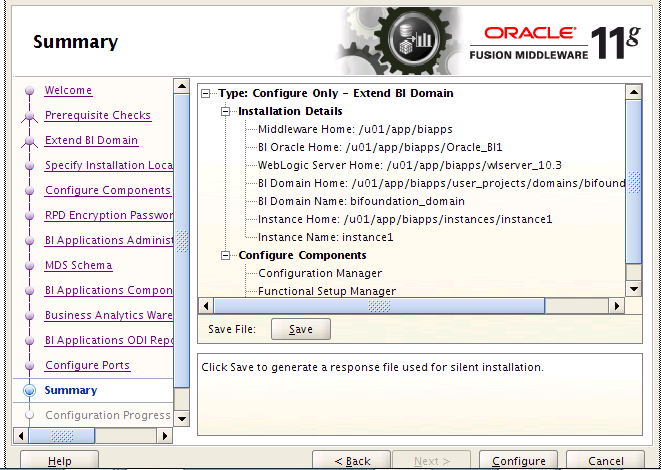
b) Go to path /home/oracle/OBIEE/Oracle_BI1/bi---->run configApps.sh
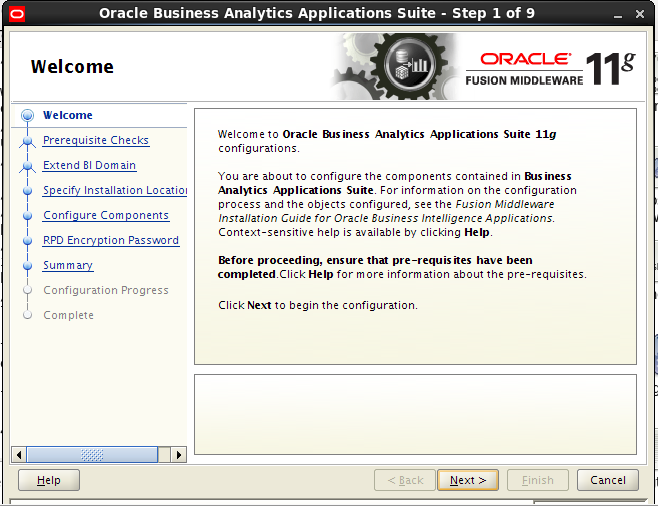
c) Click Next
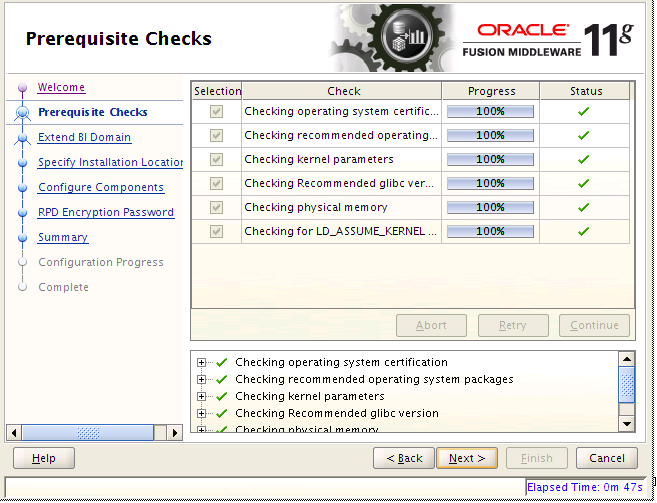
d) Click Next
e) Provide Password as Admin123 ---->Click Next
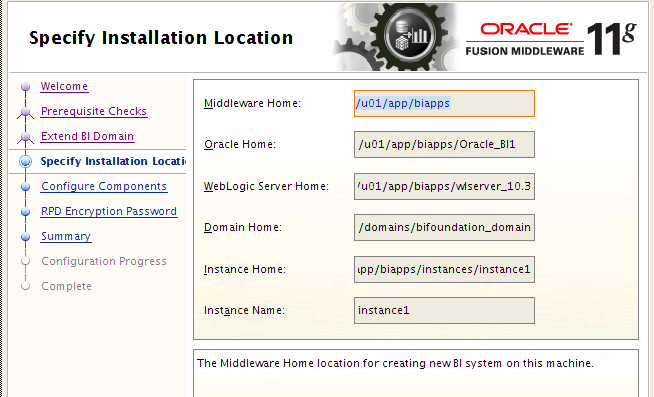
f) Observe all parameters -->you should not modify any parameters--->click on next
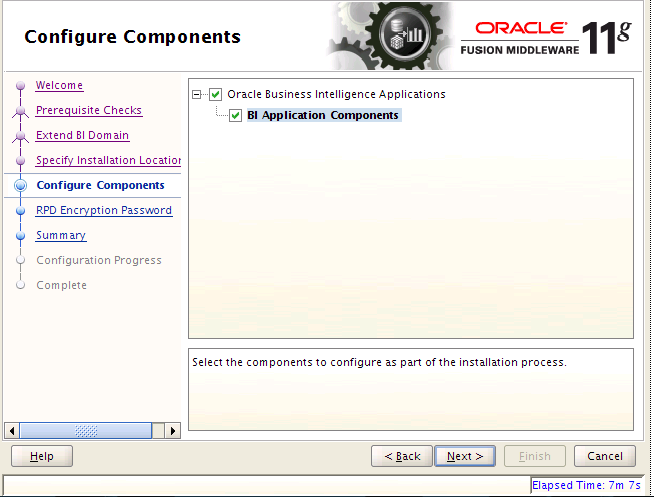
g) Select BI Application Components ---->Click on Next
h) Provide RPD password as Admin123 ----->Click on Next
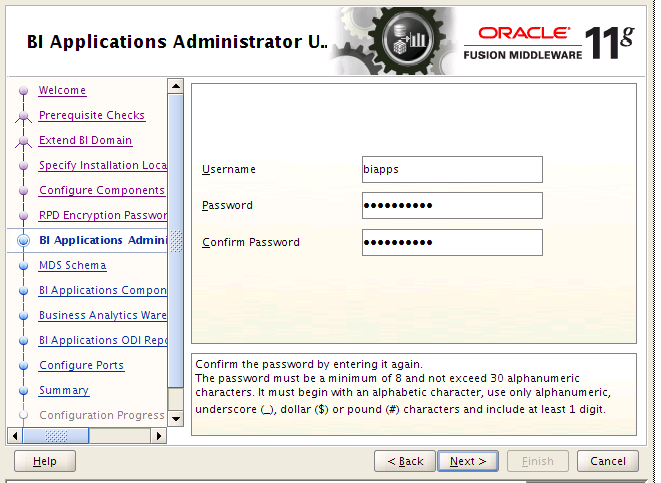
- Provide username as biapps password as Admin123
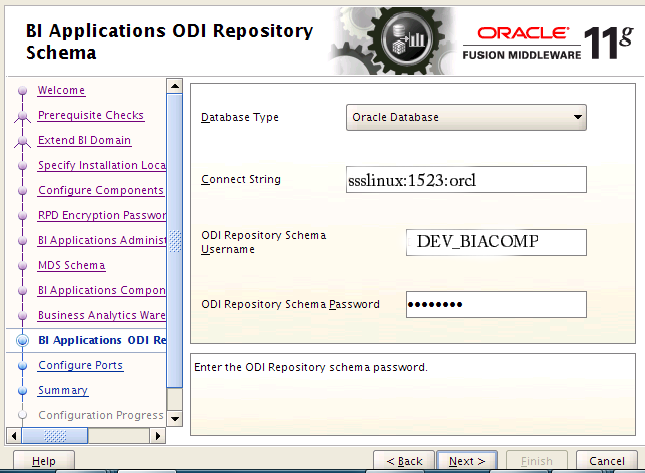
j) Provide below details ---->click On Next
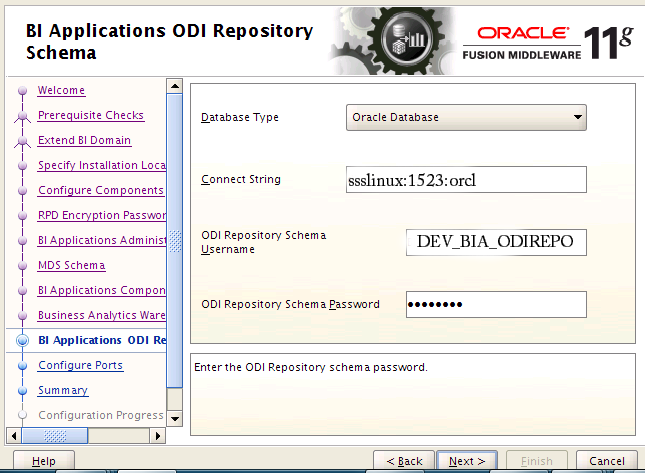
k) Provide below details ---->click On Next
l) Provide below details ---->click On Next
m) Provide below details ---->click On Next
n) Select Auto Port Configuration ---->Click on Next
o) Click to continue
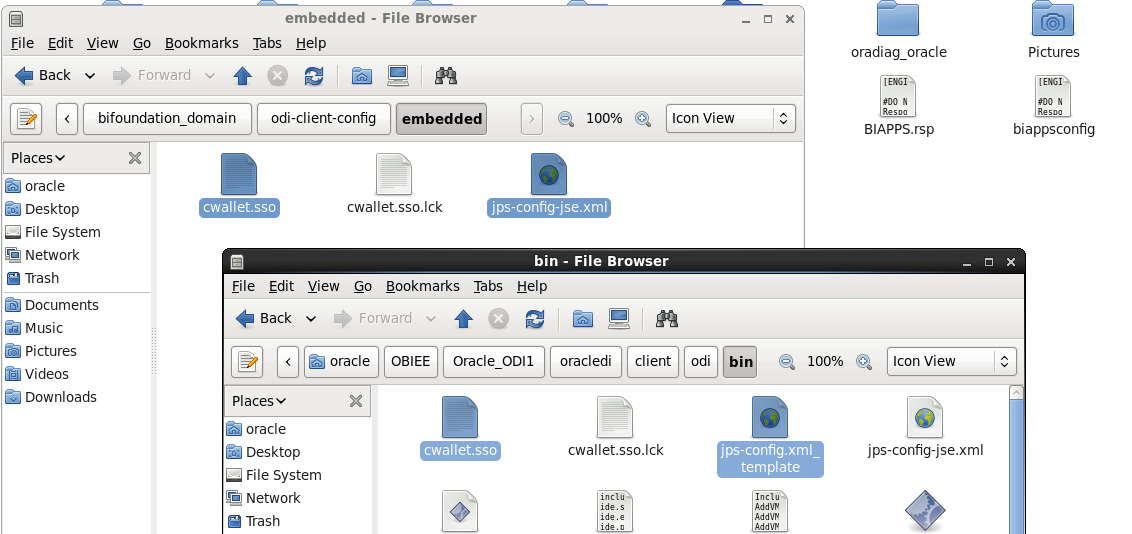
p) To synchronize the security between ODI Studio and WebLogic Server
q) Copy the files cwallet.sso and jps-config-jse.xml from
home/oracle/OBIEE/user_projects/domains/bifoundation_domain/odi-client-config/embedded to home/oracleOBIEE/Oracle_ODI1/oracledi/client/odi/bin
r) Now edit the file home/oracle/OBIEE/Oracle_ODI/oracledi/client/odi/bin/odi.conf
s). Locate the line AddVMOption -Doracle.security.jps.config=./jps-config.xml
t) Modify as shown below
u) save and close
Load Plan Generator Plug-in
v) The load plan generator plug-in for ODI is supplied in a zip file and it is used by BIACM
w) Copy and paste the file from the location
home/oracle/OBIEE/Oracle_BI1/clients/biappsclients/odi to home/oracleOBIEE/Oracle_ODI1/oracledi/client/ide/extensions
Then unzip the OBIA_LPG_PLUGIN
No comments:
Post a Comment